Showing posts with label maker. Show all posts

Wednesday, 4 January 2017

Saga of the Phone Stands


This Thingiverse phone/tablet stand works great with my Samsung S5. I can use it while it is in the stand. My hubby's has a case, so it doesn't fit quite as well and he taps his phone a bit harder than I do, so he needs a heavier base.  

I went through a few different phone prints for hubby. Most of them were great for holding the phone while it gets charged, but couldn't stand up to him actually poking his phone to navigate and use it.

I ended up with this one on Thingiverse, that I scaled slightly wider so that the plug would fit. I left the raft on to make the base just a little bit heavier. I'm not thrilled with the cord sticking out the front a bit as it curves back, but my hubby says it gives him the slack to plug/unplug it easily.

Monday, 2 January 2017

Task all the things


I make little quick custom to-do lists all the time. The first task list stencil print was too tiny, so I printed it at 150% resolution, which is just perfect for my paper scraps. (I cut paper we've printed on one-side into 1/4's for scrap notes.) I thought, oh, this will be a good stencil to try out. Turns out I've used it this many times for just the first day:

  • Grocery list.
  • Kids pack your lunch with these things.
  • Here's your list of chores this afternoon. 
  • Write a Christmas thank you letter to Grandma for these things. 
  • Hubby please Do List
  • Kids things for Snow Camp tomorrow to pack.
  • Things I want to print tomorrow on my new 3D printer!


Sunday, 1 January 2017

New Year Prints


Headphones holders.  I ran out of yellow filament and switched to orange filament.


Found this great little water diverter for a quick kids' water fountain in our basement bathroom. It works great as long as they don't turn the water on full blast- then it misses the sink!

Saturday, 31 December 2016

Batteries are Sorted and Stored!


I found this nice battery holder design on thingiverse.  It was for AA batteries, but I noticed in the comments someone had left some scaling down suggestions to turn it into a AAA battery holder. It worked well. Took about 7 hours to print overnight.

Friday, 30 December 2016

Lucky Money Cat


Because one lucky money cat is not enough.

Also printed a Naruto Bust and a toilet scrub brush holder. Booyah.

Thursday, 29 December 2016

3D Printing. Noob Impressions.


So I am quickly learning that some 3D prints are easier to accomplish than others.
Super solid things turn out well.

Things I printed today: 
  • Namaste lotus pendant that broke- can't separate from raft. 
  • A tiny Naruto figurine that broke! Then I re-printed it at 2000% scale. I will need to figure out how to make supports as gravity pulled the arms apart a little.
  • cement truck
  • cat-ears ring 
  • lucky coin
  • 2 mini shelves for my bulletin board
  • a cat treat catapult
  • cat pendant jewelry item
  • Something in Orange that I won't say here because it is a gift. My first time changing the filament, which was easy and straightforward!

It took me several tries on jewelry items to figure out that I didn't want to place them on a raft. Other than 2-footed figurines that don't look like they will balance well, I don't see much use for rafts so far. I think it has to do with the texture of my printer plate. Many printers have glass plates that people put painters tape on so that their prints didn't slip around. This printer has a special non-slip surface. However, it does make taking things off the printing plate quite tricky.  I use a wall scraper and sometimes a hammer with that to chisel the items off the plate!


Makerbot's software is fantastic. Super easy to use for this newbie and I love that I can use it from my phone or an iPad. Having a camera on the device is awesome! I can see if the plate has been cleared before I start and I can also see if there are any problems with the filament.  I do wish the camera was mounted just a little higher so you could see better at the start.

I can really easily preview the items, arrange them on the printing plate, and scale and rotate as needed. The software is great for unloading and loading the filament too.

I've even learned how to put multiple items on the same print. 


So far, I'm having a blast. 

Wednesday, 28 December 2016

My First Print


This is so cool. My daughter said some people might think this is inappropriate.
I responded, "Welcome to ART."

Tuesday, 26 April 2016

Adding an Outdoor Sink


This crazy old house had two laundry rooms in the basement when we bought it and both were in bad condition. As a result, I ended up with two of these utility sinks sitting in the garage. In a spring cleaning frenzy, I loaded the sinks into the truck with the idea of hauling them to the Restore to see if they would take them.

Then the battery on the truck was dead. So, the truck has sat loaded with junk in the driveway for a couple of days.  I spotted one of my children filling a watering can at this outdoor faucet and he was making a giant muddy mess. It dawned on me that I could really use one of those laundry sinks!  Sure enough, it works perfectly. And when my kids miss the watering can or the water gun or are just washing their hands out there, the extra water goes into the bucket below and can be used for watering my plants later.

Tuesday, 29 March 2016


Re-purposing old Valentine's chocolate tins with craft paint. The kids loved this project!

Saturday, 26 March 2016

Main floor bath update

Before/After

<><><> MINOR COSMETIC BATHROOM UPDATE <><><>

Hubby is away for a week. Since he works from home, any kind of re-modeling is very disruptive to him. This bathroom is in the worst spot for distraction- right across the hall from his home office. I thought this would be the perfect time to do a quick update.

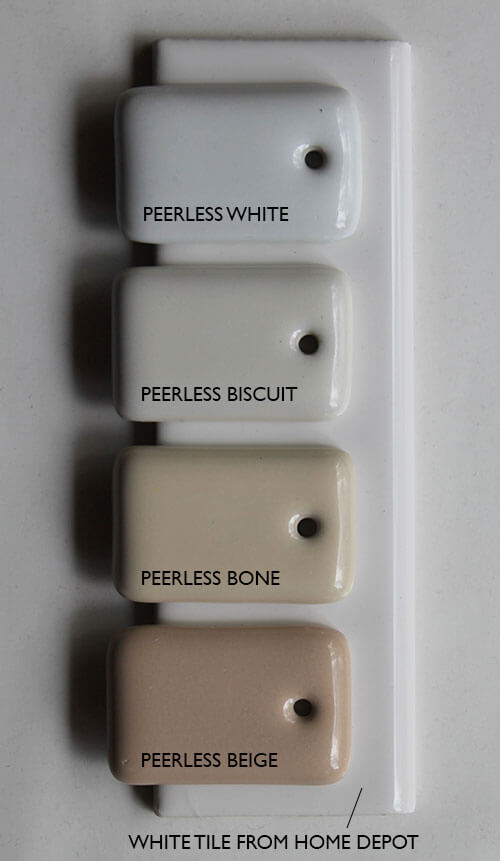
I was expecting to do just a quick paint job, but this bathroom has some quirks. The kids' bathroom is right above it, resulting in a ceiling that has suffered an occasional flood from overflowing and splashing in the tub. And until I moved to this house, I had no idea there were so many kinds of "almond" colors for the bathroom. None of these almonds match: the sink is just off-white, the toilet is bone and tub surround is tan and the tub has a salmon-orange tone to its "almond."

The previous owner tried to address these problems by picking an almond-patterned linoleum (that is now all scratched and worn out) and painting the walls yellow. They obviously had splash damage from their kids too, and they addressed this with a wall border. There are a couple places where the top of the wall is so damaged that removing the wall border would have taken half the drywall with it.

Our house is a fixer-upper with a to do list about 5 years long. Seriously. We have plans to completely demolish this bathroom down to the wall studs and combine it with the not-functioning master bath next door for a large grand soaker tub, separate shower. It will basically be a complete replacement of the plumbing, electrical, drywall and fixtures. I'm also hoping to squeeze in a 1/4 bath in part of the space in a tiny closet off the mudroom with a sink in toilet combo like this. (Check out this awesome video of someone who made their own.)

That is all pipe-dreams and smoke and a very long time from now. This is our primary main floor bathroom for ourselves and guests and kids when they are on the main floor.  I found myself not wanting to clean this bathroom. It felt old and grungy, so why bother!

Once I got into it, I thought I might be in over my head, but I managed to keep
the entire project cosmetic:

  • Patched water damaged ceiling & primed ceiling & walls with Kilz primer
  • Added a splash guard in corner of tub 
  • Painted over wall border, changing walls from yellow to grey & painted ceiling white.
  • Replaced damaged & poorly cut glass shelves with black wooden shelves & stencilled on mirror.
  • New fluorescent full spectrum light bulbs (although I might switch to LED as these have a slow warm-up time.)
  • New floor tile in a marble pattern that has all the "almond" colors in it, grey and white
  • New shower curtain
  • Removed towel bar from shower wall


Still to do:
  • touch-up trim paint
  • better shelf organization
  • maybe paint vanity cupboard
  • paint fan cover & heater vent
  • may want to do ceiling panels if this turns out to be a longer term solution.
If I do paint the base cabinet of the vanity, what is the best color? Grey like the walls? I actually held up a garbage sack to get an idea of what it would look like but maybe black would be too stark.

Monday, 12 October 2015

Halloween Pumpkins the easy way


The kids were pestering me like crazy to do the Halloween pumpkin carving, but there is no way that is going to happen this year. I told them to grab some permanent markers and have fun! I think they turned out great. But why am I so lazy and not carving them?


This summer, we demolished a rotten deck and replaced the deck with some temporary stairs to get us through the fall and winter. We plan on moving the door to a different wall and lowering the entrance to ground level next summer.


We did fine with these stairs for a month, but then Guess who tripped on her own purse strap and fell down the new stairs?!


So, no pumpkin carving for me. My kids are too small to do the carving still and having them clean out the insides is a nasty sticky mess that I'm always regretting for days after.

And hey, there is are perks-  the doctor told me no snow shoveling this winter! And I get to wear this totally awesomely decorated cast for a while!

Have you ever broken a bone? What kinds of things did you miss out on and did you find any "perks" to the situation?

[Spring update: The kids ACTUALLY did shovel all winter and they did a good job with out whining! May I never have to shovel again!]

Saturday, 5 September 2015

Garbage Stand Attempt


Every winter, our neighbor takes his bobcat and clears the alley of snow by piling it high against our fence. I would have to dig a place to put the garbage each week. This fall, I quickly scrabbled together this garbage stand out of scrap pieces of wood and cinderblocks for a base. I put the tall vertical pieces so that the neighbor can see where it is even when there is tons of snow.

I still need to put something around the base, preferably not wood that will just rot in the snow. Maybe metal flashing? I haven't decided yet. Next year I hope to actually grow grass back there... or something.

Tuesday, 23 June 2015

Tree Table


Last year, a truck slid off the icy road into one of our trees. I thought the tree was going to be okay, but the first big wind of spring blew the top of the tree right over. After levelling off the top, I sat there wondering, do I dig up the stump? What do I do with this?

While I was distracted in mommy daydreams, my oldest son comes running to report the three of them had completely smashed their wooden toy box while pretending it was a bus. The only piece remaining intact was the blue sturdy wooden lid. Thus a silly table was born. The chairs were ones that the cushions wore off and I was saving them to make new cushions. They work way better as plant stands! And I plan on adding a few more birdhouses to the table!

Note: The We Go Bagless sign is from the City of Edmonton program to promote grass-cycling and reduce the amount of trash for the waste collectors. It is a great program and a lot less work than bagging up grass!

Tuesday, 28 October 2014

Touch of Teal

The old house I've been working on for nearly a year is almost done. It is a small bungalow but the livingroom and kitchen are in this open concept style so there is a large continuous space I have been trying to figure out how to tie together to stage for sale. I just needed a pop of teal in the kitchen so I printed the little Mary Poppins quote from my computer and the rest is materials from a scrap book making kit.
To update the kitchen, we did many very simple little things. We added a sticker tile metal back splash from Home Depot. One cupboard door was in really bad shape, so I just took it off and hung wine glass holders in the top shelf.  There was a funny looking gap between the corner cupboard and the window, so I put in two corner shelves in to round out the space.

The range hood exhaust pipe was quite ugly above the cupboards. So I got some tin from Home Depot, bent it to shape, spray-painted it with white appliance enamel paint to match the appliances and it is just sitting up there looking like its attached to the range hood through the cupboard.  A little hard to see in the picture because I placed some silver metal tins up there for decoration.

Then I painted the kitchen cupboards grey and the pots are hanging from a bathroom shelf I found at Ikea. Very simple little changes, but it all came together well for a clean aesthetic and functional look.